How to: Open files downloaded from Atlas
Using lidar data as an example, this tutorial uses a free GIS application, QGIS, to demonstrate how to open and view files downloaded from Atlas.
Opening vector data
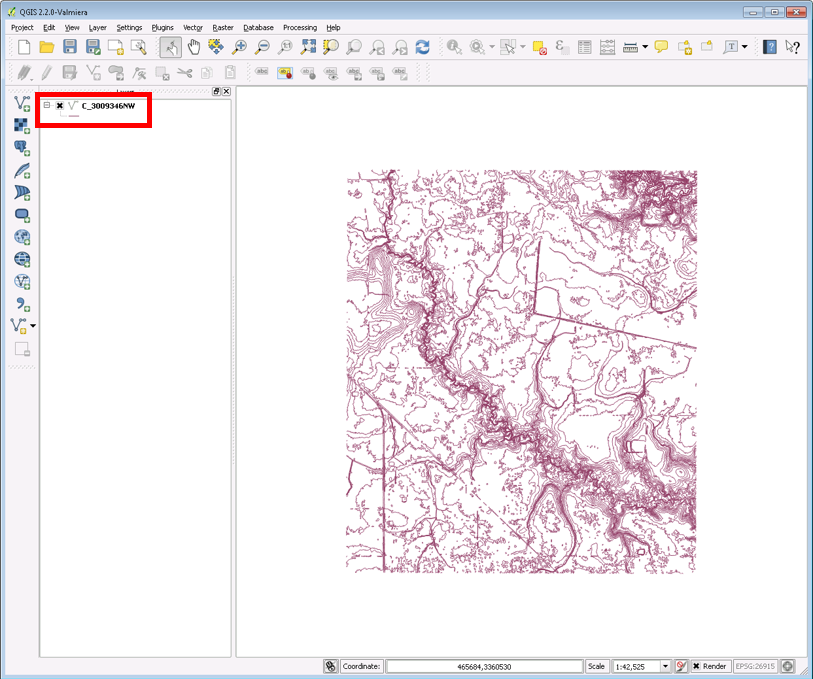
Points, lines, and polygons are examples of vector data. In addition to geometry, features in vector files can have attributes. In this example, we’ll open contours (line features) with an elevation attribute.
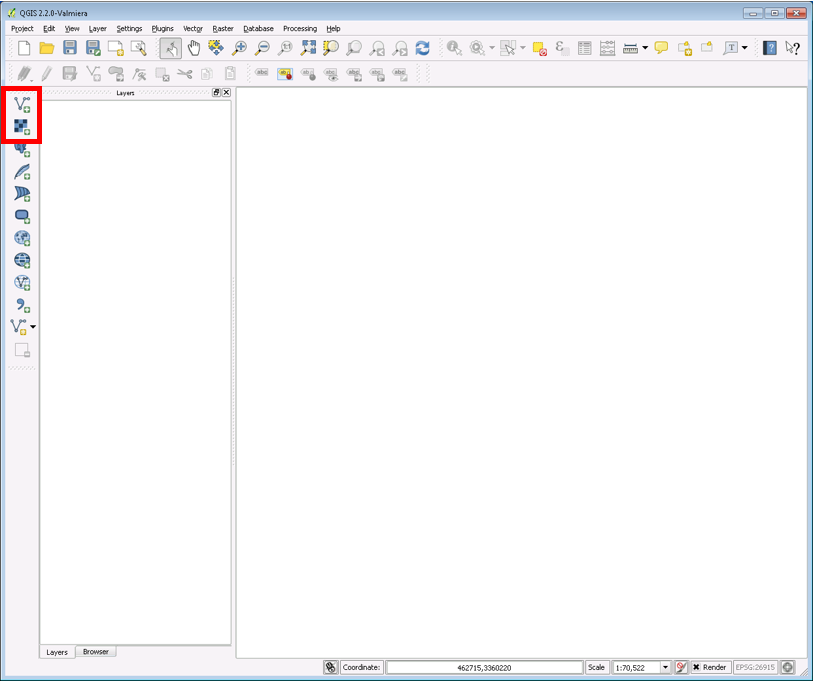
Step 1. Use the vector and raster buttons to open shapefiles and images. Clicking the vector button displays a dialog box where we can click to browse for a file.
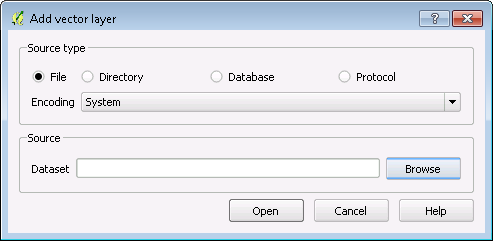
Step 2. Click browse to find your vector file.
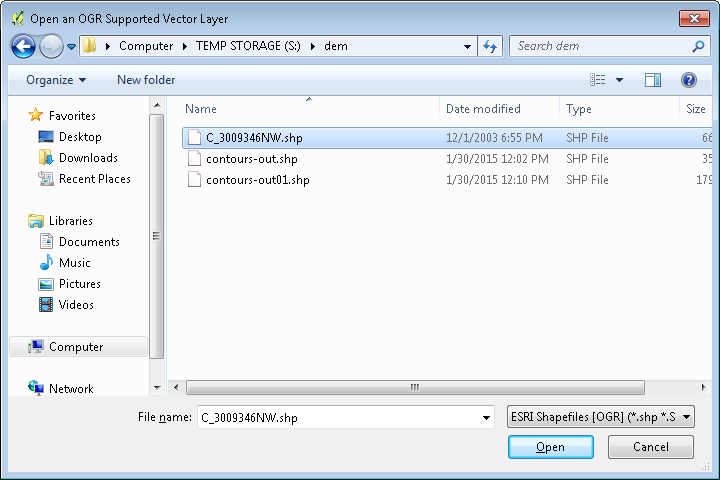
Step 3. After clicking Browse, we can navigate to the folder containing our shapefile and click Open in both boxes to see the features displayed on the map in QGIS.
Step 4. The shapefile is listed as a layer in the Layers panel. If your QGIS does not show the Layers panel, you can turn it on by clicking View > Panels > Layers.
Opening raster data
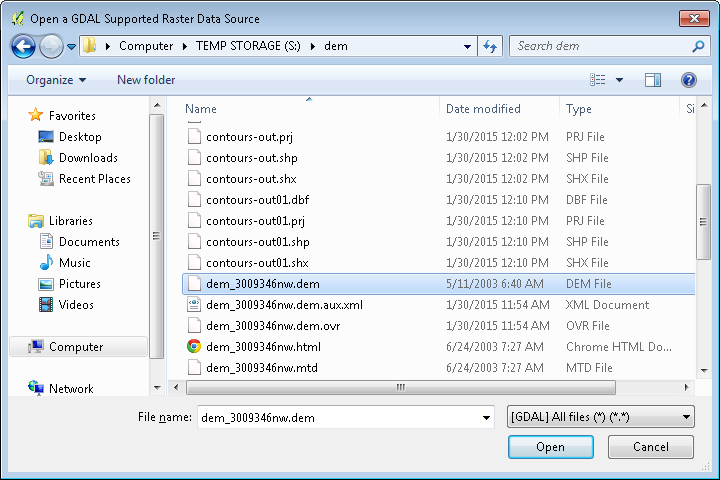
Step 5. For rasters (imagery), clicking the raster button highlighted in Step 1 will directly open the file explorer where we can navigate to and open our DEM file.
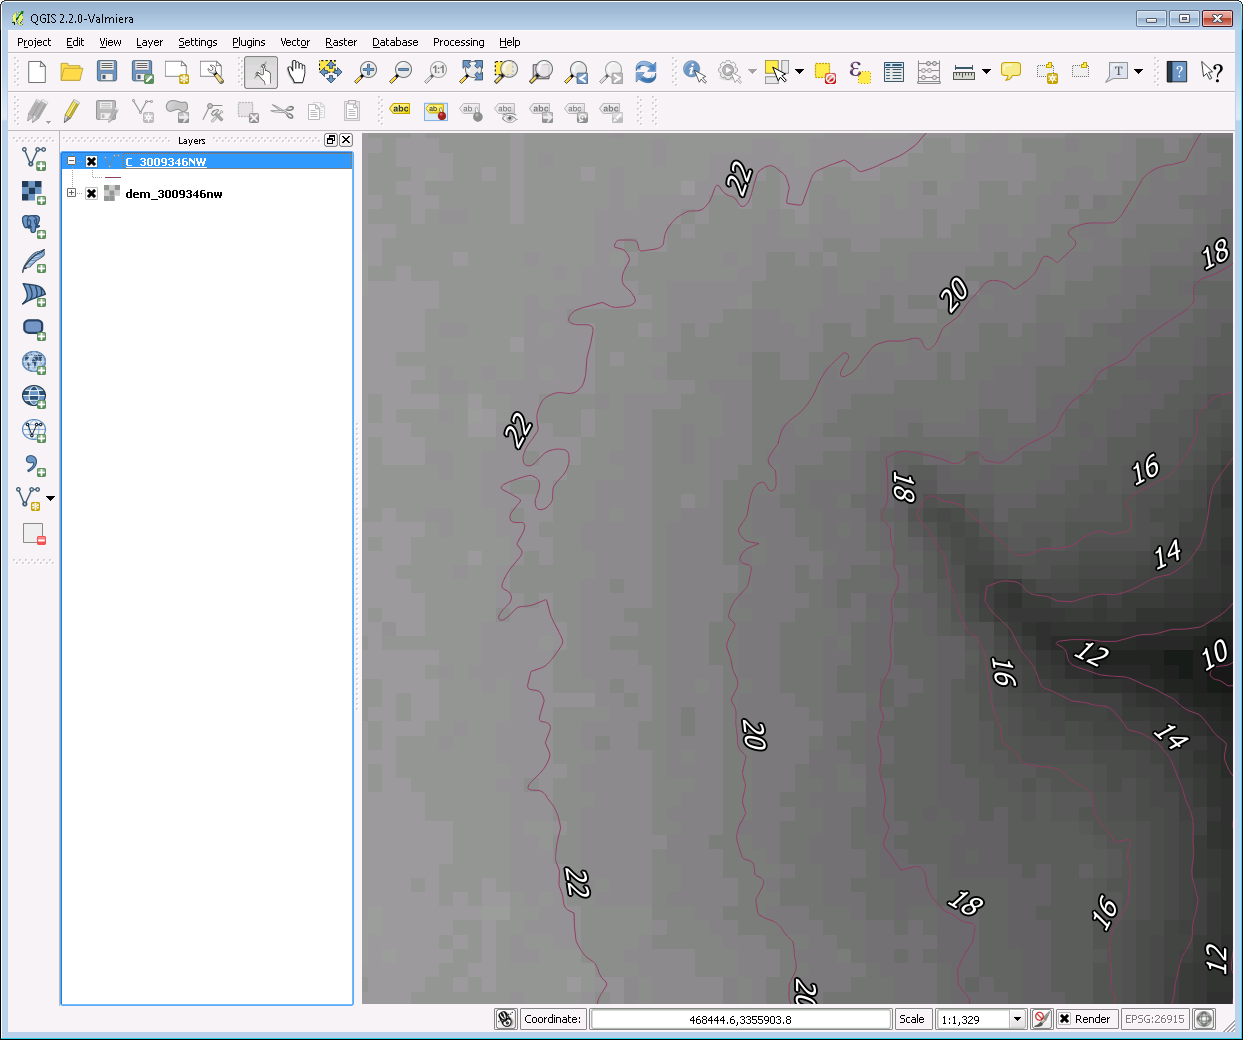
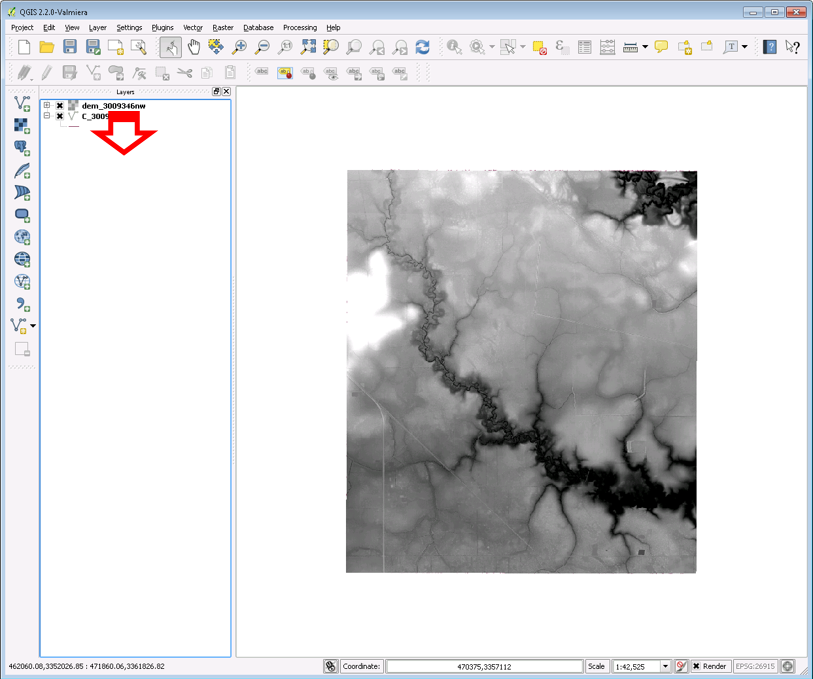
Step 6. The DEM image is added to the map and the file is listed in the legend. Note that since we opened the contour shapefile first, the DEM was added on top of it and so the contours are hidden. The DEM needs to be clicked in the Layers panel and dragged underneath the contour layer.
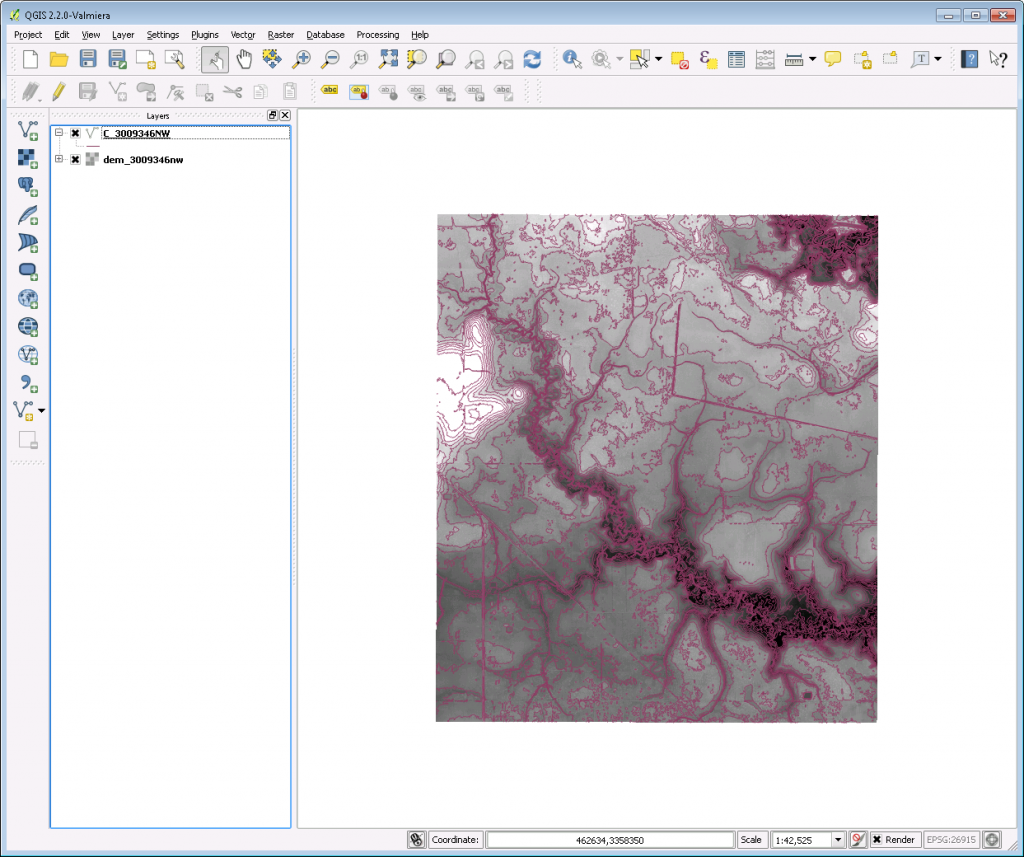
Step 7. The contour shapefile’s layer is now on top in the Layers panel, and so it is visible in the map viewer.
Labeling vector data
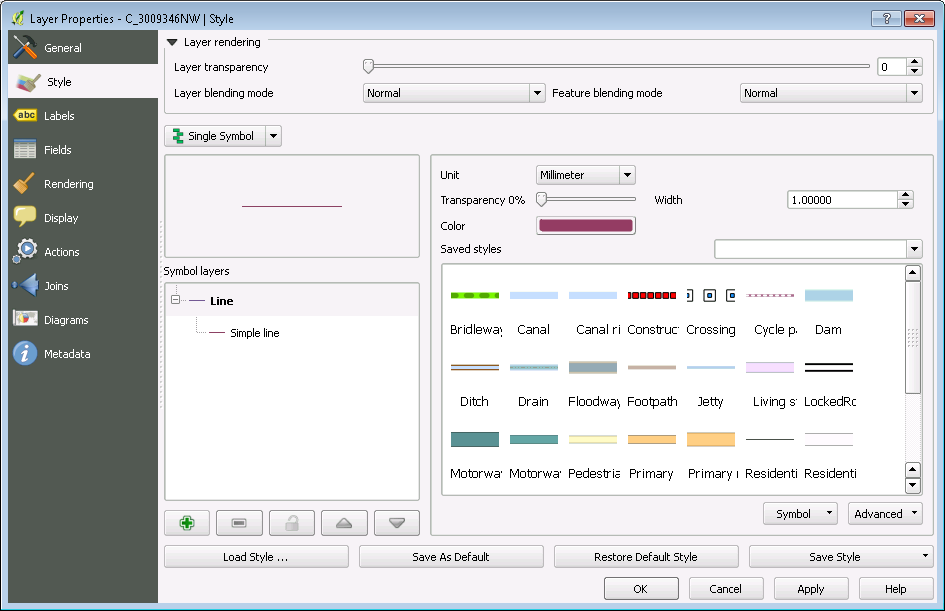
Step 8. Double-clicking on a layer name in the Layers panel will display the Layer Properties window, where we can do things like change colors and add labels.
Step 9. To label the features of a shapefile, for example, click the Labels button in the Layer Properties window and check the box next to “Label this layer with”. In the dropdown box, select the field containing the values that should be used as labels.
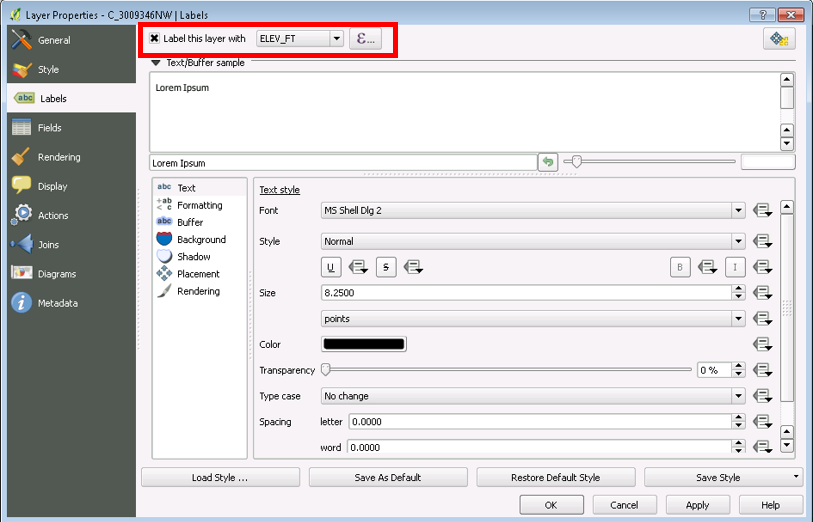
Step 10. The Labels section of the Layer Properties window has many options for customizing the look of the labels. The labels in this figure were configured with a white font color and black buffer, along with an increased font size and italic style.